A Link to the Past Characters: Difference between revisions
Jump to navigation
Jump to search


Want an adless experience? Log in or Create an account.
m (Text replacement - "|Zelda}}" to "|Zelda (A Link to the Past)}}") |
|||
| (111 intermediate revisions by 11 users not shown) | |||
| Line 1: | Line 1: | ||
This is a list of characters found in ''[[The Legend of Zelda: A Link to the Past|A Link to the Past]]''. | |||
===Link=== | == Major Characters == | ||
Link | === Link === | ||
[[File:Link-Alttp-Sprite.png|right]] | |||
{{Main|Link (A Link to the Past)}} | |||
{{Clear}} | |||
=== Princess Zelda === | |||
[[File:Princess-Zelda-Sprite.png|right]] | |||
{{Main|Zelda (A Link to the Past)}} | |||
{{Clear}} | |||
=== Agahnim === | |||
[[File:Agahnim-ALTTP-Sprite.png|right]] | |||
{{Main|Agahnim}} | |||
{{Clear}} | |||
=== Ganon === | |||
[[File:Ganon-ALTTP-Sprite.png|right]] | |||
{{Main|Ganon}} | |||
{{Clear}} | |||
=== | == Minor Characters == | ||
=== 15-Second Game Operators === | |||
[[File:15-Second-Game-Operators-1.png|right]] | |||
[[File:15-Second-Game-Operators-3.png|right]] | |||
{{Main|15-Second Game Operators}} | |||
{{Clear}} | |||
=== Aginah === | |||
[[File:Aginah-1.png|right]] | |||
{{Main|Aginah}} | |||
{{Clear}} | |||
=== Alarmed Villager === | |||
[[File:Alarmed-Villager-1.png|right]] | |||
[[File:Alarmed-Villager-5.png|right]] | |||
{{Main|Alarmed Villagers}} | |||
{{Clear}} | |||
=== | === Average Middle-Aged Man === | ||
[[File:Average-Middle-Aged-Man-1.png|right]] | |||
{{Main|Average Middle-Aged Man}} | |||
{{Clear}} | |||
=== Bomb Shop Owner === | |||
[[File:Bomb-Shop-Owner.png|right]] | |||
{{Main|Bomb Shop Owner}} | |||
{{Clear}} | |||
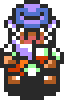
=== Street Merchant === | |||
[[File:Bottle-Merchant-1.png|right]] | |||
{{Main|Street Merchant}} | |||
{{Clear}} | |||
=== | === Bug-Catching Kid === | ||
[[File:Bug-Catching-Kid-5.png|right]] | |||
{{Main|Bug-Catching Kid}} | |||
{{Clear}} | |||
=== Bully === | |||
[[File:Bully-Sprite-1.png|right]] | |||
{{Main|Bully}} | |||
{{Clear}} | |||
=== Bully's Friend === | |||
[[File:Friend-1.png|right]] | |||
{{Main|Bully's Friend}} | |||
{{Clear}} | |||
== | === Camper === | ||
[[File:Camper-Sprite.png|right]] | |||
{{Main|Camper}} | |||
{{Clear}} | |||
=== | === Catfish === | ||
[[File:Catfish-Sprite-3.png|right]] | |||
{{Main|Catfish}} | |||
{{Clear}} | |||
=== Cursed Fairy === | |||
[[File:Cursed-Fairy.png|right]] | |||
{{Main|Cursed Fairy}} | |||
{{Clear}} | |||
=== | === Dark World Shopkeepers === | ||
[[File:Dark-World-Shopkeeper-2.png|right]] | |||
{{Main|Dark World Shopkeepers}} | |||
{{Clear}} | |||
=== | === Digging Game Operator === | ||
[[File:Digging-Game-Operator.png|right]] | |||
{{Main|Digging Game Operator}} | |||
{{Clear}} | |||
=== | === Duck === | ||
[[File:Flute-Boys-Duck-4.png|right]] | |||
{{Main|Duck}} | |||
{{Clear}} | |||
=== | === Dwarven Swordsmiths === | ||
[[File:Dwarven-Swordsmiths-7.png|right]] | |||
{{Main|Dwarven Swordsmiths}} | |||
{{Clear}} | |||
=== | === Flute Boy === | ||
[[File:Flute-Boy-1.png|right]] | |||
{{Main|Flute Boy}} | |||
{{Clear}} | |||
===Flute Boy=== | === Flute Boy's Father === | ||
[[File:Flute-Boys-Father-1.png|right]] | |||
{{Main|Flute Boy's Father}} | |||
{{Clear}} | |||
=== | === Fortune Teller === | ||
[[File:Fortune-Teller-1.png|right|Fortune Teller (Light World)]] | |||
[[File:Fortune-Teller-3.png|right|Fortune Teller (Dark World)]] | |||
{{Main|Fortune Teller}} | |||
{{Clear}} | |||
=== | === Game of Chance Operators === | ||
[[File:Game-a-Chance-1.png|right]] | |||
{{Main|Game of Chance Operators}} | |||
{{Clear}} | |||
=== | === Ghostly Proprietor === | ||
[[File:Ghostly-Proprietor.png|right]] | |||
{{Main|Ghostly Proprietor}} | |||
{{Clear}} | |||
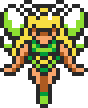
=== | === Great Fairy === | ||
[[File:Great-Fairy-Sprite.png|right]] | |||
{{Main|Great Fairy}} | |||
{{Clear}} | |||
=== | === Hooded Shopkeeper === | ||
[[File:Hooded-Shopkeeper-Sprite.png|right]] | |||
{{Main|Hooded Shopkeeper}} | |||
{{Clear}} | |||
=== | === Human Cucco === | ||
[[File:Human-Cucco-Sprite.png|right]] | |||
{{Main|Human Cucco}} | |||
{{Clear}} | |||
=== | === Kakariko Inn Patron === | ||
[[File:Kakariko-Bar-Patron.png|right]] | |||
{{Main|Kakariko Inn Patron}} | |||
{{Clear}} | |||
=== | === Kakariko Storyteller === | ||
[[File:Innkeeper-1.png|right]] | |||
{{Main|Kakariko Storyteller}} | |||
{{Clear}} | |||
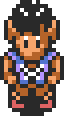
=== | === Kiki === | ||
[[File:Kiki-Sprite-4.png|right]] | |||
{{Main|Kiki}} | |||
{{Clear}} | |||
=== | === King Zora === | ||
[[File:King-Zora-1.png|right]] | |||
{{Main|King Zora (A Link to the Past)}} | |||
{{Clear}} | |||
=== | === Link's Uncle === | ||
[[File:Links-Uncle-Sprite.png|right]] | |||
{{Main|Link's Uncle}} | |||
{{Clear}} | |||
=== | === Lost Old Man === | ||
[[File:Lost-Old-Man-1.png|right]] | |||
{{Main|Lost Old Man}} | |||
{{Clear}} | |||
=== | === Loyal Sage === | ||
[[File:Loyal-Sage-Sprite.png|right]] | |||
{{Main|Loyal Sage}} | |||
{{Clear}} | |||
=== | === Mad Batter === | ||
[[File:Mad-Batter-2.png|right]] | |||
{{Main|Mad Batter}} | |||
{{Clear}} | |||
=== | === First Maiden === | ||
[[File:Maiden-1.png|right]] | |||
{{Main|Seven Maidens#First Maiden}} | |||
{{Clear}} | |||
=== | === Second Maiden === | ||
[[File:Maiden-2.png|right]] | |||
{{Main|Seven Maidens#Second Maiden}} | |||
{{Clear}} | |||
=== | === Third Maiden === | ||
[[File:Maiden-3.png|right]] | |||
{{Main|Seven Maidens#Third Maiden}} | |||
{{Clear}} | |||
=== | === Fourth Maiden === | ||
[[File:Maiden-4.png|right]] | |||
{{Main|Seven Maidens#Fourth}} | |||
{{Clear}} | |||
=== | === Fifth Maiden === | ||
[[File:Maiden-5.png|right]] | |||
{{Main|Seven Maidens#Fifth Maiden}} | |||
{{Clear}} | |||
=== | === Sixth Maiden === | ||
[[File:Maiden-3.png|right]] | |||
{{Main|Seven Maidens#Sixth Maiden}} | |||
{{Clear}} | |||
=== | === Man in Blind's Hideout === | ||
[[File:Man-in-Blinds-Hideout-1.png|right]] | |||
{{Main|Man in Blind's Hideout}} | |||
{{Clear}} | |||
=== | === Maple (GBA version only) === | ||
[[File:MapleALttP.png|right]] | |||
{{Main|Maple}} | |||
{{Clear}} | |||
=== | === Pikku === | ||
[[File:Pikku-1.png|right]] | |||
{{Main|Pikku (Character)}} | |||
{{Clear}} | |||
=== | === Quarreling Brothers === | ||
[[File:Quarreling-Brothers-1.png|right]] | |||
{{Main|Quarreling Brothers}} | |||
{{Clear}} | |||
=== | === Running Man === | ||
[[File:Running-Man-1.png|right]] | |||
{{Main|Running Man}} | |||
{{Clear}} | |||
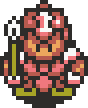
=== | === Sahasrahla === | ||
[[File:Sahasrahla-1.png|right]] | |||
{{Main|Sahasrahla (A Link to the Past)}} | |||
{{Clear}} | |||
=== | === Sahasrahla's Grandson === | ||
[[File:Sahasrahlas-Grandson.png|right]] | |||
{{Main|Sahasrahla's Grandson}} | |||
{{Clear}} | |||
=== | === Sahasrahla's Wife === | ||
[[File:Sahasrahlas-Wife.png|right]] | |||
{{Main|Sahasrahla's Wife}} | |||
{{Clear}} | |||
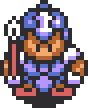
=== | === Soldier === | ||
[[File:Soldier-Gold-Sprite.png|right]] | |||
[[File:Soldier-Blue.png|right]] | |||
[[File:Soldier-Red.png|right]] | |||
{{Main|Soldier}} | |||
{{Clear}} | |||
=== | === Sweeping Lady === | ||
[[File:Sweeping-Lady-1.png|right]] | |||
{{Main|Sweeping Lady}} | |||
{{Clear}} | |||
=== | === Storytelling Bird === | ||
[[File:Storytelling-Bird-1.png|right]] | |||
{{Main|Storytelling Bird}} | |||
{{Clear}} | |||
=== Storytelling Hand === | |||
[[File:Storytelling-Hand-1.png|right]] | |||
{{Main|Storytelling Hand}} | |||
{{Clear}} | |||
=== Storytelling Insect === | |||
[[File:Storytelling-Insect.png|right]] | |||
{{Main|Storytelling Insect}} | |||
{{Clear}} | |||
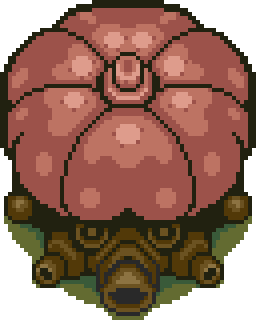
=== Storytelling Octopus === | |||
[[File:Storytelling-Octopus-1.png|right]] | |||
{{Main|Storytelling Octopus}} | |||
{{Clear}} | |||
=== Storytelling Tree === | |||
[[File:Storytelling-Tree-1.png|right]] | |||
{{Main|Storytelling Tree}} | |||
{{Clear}} | |||
=== Syrup === | |||
[[File:Syrup-ALTTP-Sprite.png|right]] | |||
{{Main|Syrup}} | |||
{{Clear}} | |||
=== Syrup's Assistant === | |||
[[File:Hooded-Shopkeeper-Sprite-2.png|right]] | |||
{{Main|Hooded Shopkeeper}} | |||
{{Clear}} | |||
=== Talking Tree === | |||
[[File:Talking-Tree.png|right]] | |||
{{Main|Talking Tree}} | |||
{{Clear}} | |||
=== Thief === | |||
[[File:Thief-Character.png|right]] | |||
{{Main|Thief (Character)}} | |||
{{Clear}} | |||
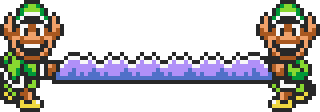
=== Twin Lumberjacks === | |||
[[File:Twin-Lumberjacks.png|right]] | |||
{{Main|Twin Lumberjacks}} | |||
{{Clear}} | |||
=== Venus === | |||
[[File:Venus-Sprite.png|right]] | |||
{{Main|Venus}} | |||
{{Clear}} | |||
=== Waterfall of Wishing Fairy === | |||
[[File:Waterfall-of-Wishing-Fairy.png|right]] | |||
{{Main|Waterfall of Wishing Fairy}} | |||
{{Clear}} | |||
{{Cat|A Link to the Past|Characters}} | |||
{{Cat|A Link to the Past Characters| }} | |||
{{Cat|Characters|Link to the Past, A}} | |||
{{Cat|Listings|Link to the Past, A}} | |||
Latest revision as of 14:47, November 30, 2022
This is a list of characters found in A Link to the Past.
Major Characters
Link
- Main article: Link (A Link to the Past)
Princess Zelda
- Main article: Zelda (A Link to the Past)
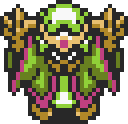
Agahnim
- Main article: Agahnim
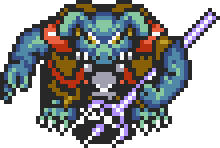
Ganon
- Main article: Ganon
Minor Characters
15-Second Game Operators


- Main article: 15-Second Game Operators
Aginah

- Main article: Aginah
Alarmed Villager


- Main article: Alarmed Villagers
Average Middle-Aged Man

- Main article: Average Middle-Aged Man
Bomb Shop Owner

- Main article: Bomb Shop Owner
Street Merchant

- Main article: Street Merchant
Bug-Catching Kid

- Main article: Bug-Catching Kid
Bully
- Main article: Bully
Bully's Friend

- Main article: Bully's Friend
Camper
- Main article: Camper
Catfish
- Main article: Catfish
Cursed Fairy

- Main article: Cursed Fairy
Dark World Shopkeepers

- Main article: Dark World Shopkeepers
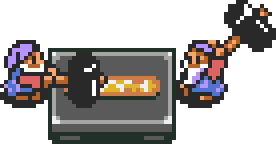
Digging Game Operator

- Main article: Digging Game Operator
Duck

- Main article: Duck
Dwarven Swordsmiths

- Main article: Dwarven Swordsmiths
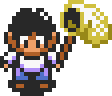
Flute Boy

- Main article: Flute Boy
Flute Boy's Father

- Main article: Flute Boy's Father
Fortune Teller


- Main article: Fortune Teller
Game of Chance Operators

- Main article: Game of Chance Operators
Ghostly Proprietor

- Main article: Ghostly Proprietor
Great Fairy
- Main article: Great Fairy
Hooded Shopkeeper
- Main article: Hooded Shopkeeper
Human Cucco
- Main article: Human Cucco
Kakariko Inn Patron

- Main article: Kakariko Inn Patron
Kakariko Storyteller

- Main article: Kakariko Storyteller
Kiki
- Main article: Kiki
King Zora

- Main article: King Zora (A Link to the Past)
Link's Uncle
- Main article: Link's Uncle
Lost Old Man

- Main article: Lost Old Man
Loyal Sage
- Main article: Loyal Sage
Mad Batter

- Main article: Mad Batter
First Maiden

- Main article: Seven Maidens#First Maiden
Second Maiden

- Main article: Seven Maidens#Second Maiden
Third Maiden

- Main article: Seven Maidens#Third Maiden
Fourth Maiden

- Main article: Seven Maidens#Fourth
Fifth Maiden

- Main article: Seven Maidens#Fifth Maiden
Sixth Maiden
- Main article: Seven Maidens#Sixth Maiden
Man in Blind's Hideout

- Main article: Man in Blind's Hideout
Maple (GBA version only)

- Main article: Maple
Pikku

- Main article: Pikku (Character)
Quarreling Brothers

- Main article: Quarreling Brothers
Running Man

- Main article: Running Man
Sahasrahla

- Main article: Sahasrahla (A Link to the Past)
Sahasrahla's Grandson

- Main article: Sahasrahla's Grandson
Sahasrahla's Wife

- Main article: Sahasrahla's Wife
Soldier


- Main article: Soldier
Sweeping Lady

- Main article: Sweeping Lady
Storytelling Bird

- Main article: Storytelling Bird
Storytelling Hand

- Main article: Storytelling Hand
Storytelling Insect

- Main article: Storytelling Insect
Storytelling Octopus

- Main article: Storytelling Octopus
Storytelling Tree

- Main article: Storytelling Tree
Syrup
- Main article: Syrup
Syrup's Assistant
- Main article: Hooded Shopkeeper
Talking Tree

- Main article: Talking Tree
Thief

- Main article: Thief (Character)
Twin Lumberjacks

- Main article: Twin Lumberjacks
Venus
- Main article: Venus
Waterfall of Wishing Fairy

- Main article: Waterfall of Wishing Fairy